Thank you for supporting us on our adventure!! Learn more
How to make robust, lightweight and affordable furniture for your van
Last updated on 24 Nov 2022 by Thierry
Finally, a step where one can do some manual work!
This post will show you how we managed on our own to make a robust, lightweight and affordable piece of furniture for our van.
It covers the building of a first and basic version of the furniture, for us to test before moving forward with the more elaborate stages, like carpeting, painting,…
The article intends to provide information to answer such questions as:
- how to build a piece of furniture for a van?
- what kind of material to use?
- how to secure the structure to the van?
- how long does it take and how much it costs?
The guidance detailed here is based on furniture customized for our particular setup, so may require some modifications to work on your vehicle. However, we hope you will be able to use the ideas and principles we used to build and arrange everything.
Post Contents
What we are looking for in our setup
The piece of furniture that we need for our Mitsubishi Delica conversion, based on our design, includes:
- a sleeping platform of 190x140cm
- a kitchen drawer with a cooking hob, pots, plates, cutlery
- several storage compartments:
- a big compartment accessible from the rear to store the pushchair
- storage for a water tank
- a compartment for a leisure battery (provision)
- storage compartments accessible from the sliding door
- more additional storage on top of the wheels on each side of the car
Everything has to be easily accessible and not requiring stupid poses to access the different areas.
For our build, with no garage to perform the work and no power supply, we had to design the furniture with the assembly process in mind:
- the assembly shall be possible with standard wireless power tools and hand tools
- the furniture can be built directly outdoors on the side of the street where the van is parked
- the modularity shall allow us to relocate easily when we build (UK weather!)
- we should use affordable materials to build the furniture for our van
How to build lightweight and robust furniture for a van conversion?
Building the structure should not be excessively difficult but demands some patience! 🙂
It usually does not require lots of tools or exotic ones. Well… It still depends on what design you are coming up with and the type of material you intend to use. There are several possibilities, for example:
- Wood: redwood, whitewood, plywood,…
- Aluminium profiles with accessories
- Welded steel
- …
There are basically no limitations as long as it is robust enough and lightweight.
It has to be light. As light as possible.
More weight = more energy used (diesel burnt) to move the van = more expensive!
In our case, we have chosen wood for several reasons: the availability of the raw material, the ease to work with, the tools needed and the possibility to change location.
What kind of wood do you use for a camper van?
Our design can be divided into different sections, made in order: the understructure, the bed platform, 2 lateral compartments and the kitchen drawer.
The first version of our first build (testing unit) has a few differences compared to the full model depicted in our design video:
- Bed folding panels
- Rear access closing panel
- Kitchen sub-drawer
- Lateral compartments structure
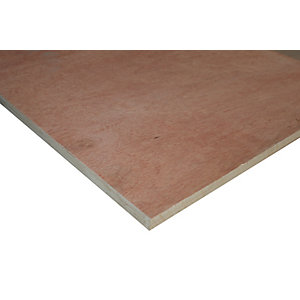
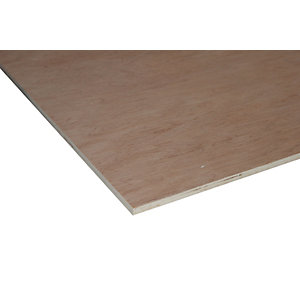
We have opted for a mix of plywood (18mm – ¾”, and 12mm – ½”) + good quality whitewood, from our local Wickes store.
The building technique is similar to a “stick-built” where the structure is made of standard pieces of lumber (69mm x 18mm planks for us), instead of using only 18mm plywood like for a traditional cabinet in a house. That would have been even easier to build, very robust, but also incredibly heavy (a sheet of 18mm plywood is at least 30kg and we would have needed several of them for our structure. To give you an idea, a small frame used to support the bed platform weighs about 3.5kg with our technique and would have weighed at least 5.7kg in plywood (+ 62%!!).
The understructure
As per our design, the structure is composed of different frames attached together. We used good quality whitewood with only a few little knots. That’s important if you don’t want to see your wood split when you drive a screw in it.
Each frame is made of several pieces cut to length using a hand saw and assembled by a combination of wood glue and pocket holes (more details later in the post). The different frames are then connected with wooden dowels and then locked in position with screws.
tip: the whitewood is generally made for indoor use. We would recommend treating it when used in a vehicle to avoid rot in the future.
In addition, we added some compartment dividers made of 12mm (1/2″) plywood, to “close” the storage accessible from the tailgate (pushchair) from the storage accessible from the sliding doors (clothes, etc). An additional divider behind the kitchen drawer allows us to create another compartment where to store our leisure battery.
The plywood panels are locked onto the structure using wooden dowels.


The bed platform
The sleeping platform is made of 18mm (¾”) plywood which can be cut with a hand saw. However, we had the possibility to cut our plywood sheets with a circular saw while visiting a friend on a sunny day. We could not reasonably refuse the offer. In addition, we cut an access panel to the leisure battery compartment located under the bed.
The main panel is attached to the understructure with wooden dowels and screws. The additional mobile panels for the bed structure are not linked to the main box via piano hinges anymore. The panels are simply cut to dimensions and placed into position above the middle seats for sleeping and stored away when needed. This is due to clearance issues with the round roof.
tip: round the corners of the panel exposed. Your hands, knees and elbows will thank you! 🩹👍🏻


The lateral compartments
Those ones, located around the wheels, are also a combination of frames made of whitewood and plywood panels (a mix of 12 and 18mm). The main difference is that the covers are just placed into position so that they can be removed completely to access the technical sections (water and electricity) plus storage. Parachute cord handles allow access to the compartments.
We had to deviate from our initial design here, by changing the structure of the lateral compartments to follow the shape of the van and also to make space for our water tank.


The kitchen drawer
The drawer is made of 12mm (½”) plywood, cut and assembled using the same tools and methods (dowels and screws). The handle is made with a parachute cord. An upper horizontal panel receives the cooking hob, and the kitchenware is stored under it.
2 deviations to our initial design here:
- the folding panel that closes the access at the rear of the car, also 12mm plywood, is not installed at this point in time. We keep it as an option for later, it would be attached to the understructure with a piano hinge.
- we are not installing the sub-drawer for the kitchenware (pots, plates, cutlery, etc). Instead, we fitted a bottom panel so that we can use the full volume of the drawer. We may add an organiser or storage boxes in the future.

Assemble the pieces together
How can you connect pieces of wood together to put together your furniture?
To build our van furniture, we used basically 3 different techniques, each of them for a different need.
Simple butt joint
The simplest way to connect pieces of wood together is to use butt joints. A butt joint consists of two pieces of wood joined by placing their ends (butts) together without any special shaping and screws or nails driven down both pieces. Simple, yes, but weak.
Butt joints need to be kept for places free from or with relatively low constraints.
With a butt joint, all the strength of the joint resides in the screws catching into the end grain of the wood. Think of a piece of wood like a pack of spaghetti held together. If you insert something (screw) at the end of it (end grain), the spaghetti will move and make space to accommodate the screw. If you screw from the side (face grain), the spaghetti will not be able to spread, as they are being held tight.
So how to screw into the face grain to join two pieces of wood together?
Pocket holes joint
As much as you can, you should use pocket hole joints. This technique requires a jig and special screws, but remains simple, and provides much stronger joints.
We have used 50 pocket holes joint to build our furniture, mainly to assemble the frames under the bed platform, and the lateral compartments.
The principle is quite simple: pocket hole joints are somehow similar to butt joints, except that screws are driven into the wood with an angle (usually 15 degrees, set by the jig). Thanks to this angle, the screws are catching in the face grain instead of the end grain, resulting in a much stronger joint than with a typical butt joint.
tip: add wood glue on the contact surface between the two pieces of wood for an even more resistant joint.
Wooden dowel assembly
I use dowels where I need accuracy. For our van furniture, I have used dowels in three cases:
- to accurately position between several pieces of wood (bed platform and kitchen drawer)
- to create a joint in a relatively thin piece of wood (dividers made of 12mm plywood for example),
- when I couldn’t have screws showing (kitchen drawer front)
Dowels are thicker and sturdier than nails or screws and therefore less prone to breakage, which gives strong joints. Combine with wood glue, they provide an even stronger joint.
If you want to see more about wood joints performances, you may want to have a look at this video by DIY Builds:
Securing the furniture to the van (very important!)
You cannot reasonably let your furniture loose in the van, for at least 2 reasons:
- it will move around when you are driving, damaging your van and the structure,
- more importantly, it is a major safety issue. You don’t want your structure to crash on you during an emergency braking event!
Our choice is not to alter the van definitely and to have the possibility to return the van to its original 7-seater configuration. In this case, to secure the furniture to the van, the easiest way is to use the fixation points from the seats we have removed and stored away.
We have used some eye bolts of good diameter and thread and used ratchet tie-down lashing straps running between the understructure and the bed platform. Simple and efficient!


More practical information!
Now that we have shown you what we have done to make this piece of furniture for our campervan, it is time to put some figures on the table:
Is our build time-consuming and is it affordable as expected?
Let’s see that in the next sections.
How long for building this furniture for our van conversion?
Building this piece of furniture for our van didn’t take a long time.
We started the build on the 16th of May laying the first piece of wood at the back of the Mitsubishi Delica and finished the “test rig” on the 11th of June (and going for a test on the 12th!). In terms of days, this might look like a long process. However, we have been working on our project mainly after work during the week, and a bit during some of the weekends. We have not been working every day either. In terms of worked hours, that took us about 26 hours to complete the job, equivalent to 3 days full-time. Not bad! 😄
What we used for our build
Material and consumables
| Image | Quantity | Description | Comment | Cost (£) |
|---|---|---|---|---|
 | 3 | Whitewood 2400 x 69 x 18mm (pack of 4) | structural frames | 64.62 |
 | 1 | Heavy Duty Drawer Runners 650mm Full Extension 50kg (1 pair) | Runners for the kitchen drawer | 38.39 |
 | 1 | Plywood sheet 1200 x 2440 x 18mm | Bed platform (main & folding panels) | 37 |
 | 1 | Plywood sheet 1200 x 2440 x 12mm | Kitchen drawers & underbed panelling | 32 |
 | 1 | Ratchet tie down lashing straps (pack of 4) | to secure the structure to the van | 17.47 |
 | 1 | M10 eye bolt 304 stainless steel (pack of 5) | to secure the structure to the van | 14.67 |
 | 1 | Pocket hole screws No.8 x 1-1/4" (pack of 100) | Coarse thread for the structure | 9.8 |
 | 1 | Wooden dowel kit | Positioning of panels | 11.95 |
 | 1 | Parachute cord 4mm | drawer and cover handles | 7.99 |
 | 1 | Back panel drawer brackets (pack of 100) | to hold the bottom of the drawer | 6.88 |
 | 1 | Weatherproof high-strength wood glue | ... to glue! | 5.99 |
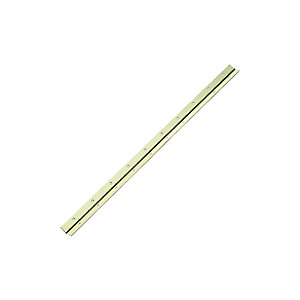 | 1 | Piano hinges 600mm | Leisure battery compartment access | 5.31 |
 | 1 | Sandpaper sheets | to round the edges and get rid of spliters | 5.85 |
| Total | 257.92 |
Tooling specifically bought for this build
| Image | Quantity | Description | Comment | Cost (£) |
|---|---|---|---|---|
 | 1 | Stepped drill bit | 7.99 | |
 | 1 | Pocket hole jig Simplest model available? | 6.25 | |
 | 1 | G-clamps (pack of 3) | 5.58 | |
 | 1 | Drill bit for Kreg pocket hole screws #2 square drive bit | 6.94 | |
| TOTAL | 26.76 |
Altogether, we have spent £273.04 specifically to build a robust, lightweight and therefore affordable piece of furniture for our van conversion (prices in the tables above may have changed since).
We didn’t include in the calculation the hand saw (£12), wireless drill and drill bits (£60) as we had them already. The same for the circular saw we have been using to cut the plywood (about £50)
And so… What’s next?
Now that the basic structure is in place, we are starting a test phase with the van and will be hitting the road on weekends and holidays.
This is for:
- Checking nothing breaks
- Ensuring that what we have built is fit for purpose
At the end of the test phase, we may identify some improvements and after that finalise our furniture with carpet, paint and finishing profiles. Oh yeah, and installing electrics!
Building lightweight, robust and affordable furniture for your van on your own (or with family and friends!) is achievable. I am quite OK with DIY, but really if that’s your first project, as long as you are patient and check everything twice before cutting boards and so on, you will be alright! There is also always the possibility to seek advice from someone more experienced.
Are you in the process of converting a van? We would be happy to answer your questions
Have you completed your conversion? We would love to hear about how you have proceeded!
Please let us know in the comments, or via our contact page!


4 Comments
Pingback:
Brad
Where have the photos gone? Can’t see em 🙂
Brad
Don’t worry, they finally loaded ha weird. Love ya work!
Anna
Thanks Brad!